STRETCH & REST CARE for the wellness warrior |
|
Has this snuck up on you too? Those trips to the bathroom at night? It's common as we age but there really isn't any research to show it's normal. You may not realize how disruptive to deep sleep every bathroom trip is. I didn't until recently. I've been working on improving my sleep quality for over a year but hadn't really addressed my bladder. I'd connected the dots on drinking fluids late at night with more frequent trips but not much beyond that. It helps me for sure to limit fluids a few hours before bed and just take sips of water if I need it during the night. And last year I'd cut back on caffeine as I became more sensitive to it disrupting my sleep. But there is much more you can do to improve your bladder health and ultimately decrease those trips to the bathroom. Let's start with 6 Bladder irritants you may not be aware of:
Not everyone is sensitive to these but it's worth checking out to help your brain know it doesn't have to send a signal to your bladder to empty at night. Uncovering your sensitivities can also help if you have frequent UTI's (Urinary Tract Infections) or leaking when you sneeze, cough, laugh, or during activity. It might take some detective work and monitoring your bathroom trips to figure out if you're sensitive to any of them. If you do uncover sensitivities, start to reduce how often you consume them especially later in the day. For some, you may have to eliminate them all together. Next up, I'll share what has eliminated my trips to the bathroom most nights AND helped me stop needing Melatonin the first week I started doing it. To Better Sleep! Mollie P.S. Ready for more Energy & Flow? It's almost time for our FREE Summer Workshop & the inside scoop on our next REST Camp: SHINE™! Get on the interest list here.
0 Comments
Besides backing up in the car, how often do you twist and look behind you in a day? Computers, phones, and even back up car cameras are messing with our movement patterns. Stiffness and loss of thoracic rotation used to just be related to poor posture and aging but technology is definitely contributing to spine issues. Our bodies & brains weren't meant to be staring at a screen all day. Even if you play a sport like golf or tennis that involves rotation, it's highly unlikely you're playing as much as you look at a screen. Remember our fascia (connective tissue) takes the shape of the thing we do most during the day. It's time to add some Seated Twist breaks to your day or when sitting at the computer for long periods. BENEFITS OF THE SEATED TWIST:
Stop what you're doing and let's do some Seated Twists together.  HOW TO DO A SEATED TWIST:This position targets your mid back muscles and helps with digestion. It can be done sitting in a chair or the floor.
PRO TIP: On each breath, visualize your head and tailbone pulling away from one another as you lengthen through your spine. Focus on getting taller more than twisting. Don't force the twist. Be mindful of your current mobility. I've got a lot of upper body & back tightness so I prefer to do the Seated Twist in a chair. Placing my arm over the back of the chair takes the tightness in my arms out of it and gives me some proprioceptive feedback & resistance so I can have better posture while I'm twisting. Basically, I feel more of a stretch in my spine because it's less fascia stretching. If you have issues with constipation, try 3 twists a day and see how your body responds. Whenever you need an energy boost during the day, do a twist. Your body will love it. Twist It Out! Mollie P.S. If you want better Energy and Mobility, you'll want to get on the wait list for our next REST Camp: SHINE™ - exciting updates & details coming soon! Our 13 year old dog, Teddie, got a home exercise program to strengthen his back and hips at his last vet appointment and that, of course, made me think of 2 FIT TIPS to help YOU get stronger. We’d noticed he was having more stiffness and difficulty getting up from the floor or jumping up onto surfaces. Apparently, it’s common for dogs to start to overuse their stronger front legs as they age and start to develop arthritis/pain in their spine or hips. We went deeper into why that is to satisfy my PT brain, but I won’t bore you with that. More importantly, the discussion reminded me of 2 Healthy Aging Moves to share with you. But first, check out Teddie being a good boy doing his homework: 3 sit to stands every day to strengthen his back and hips/legs. Yes, snacks are included!  Here's Your Homework (without the snacks):1. ADDRESS YOUR WEAK SPOTSTeddie’s vet visit was a great example of how our brain loves to find the easiest way to move so you’ll automatically default to overusing your stronger muscles even if that isn’t an efficient movement pattern. We all have muscle imbalances in our body based on which hand is dominant, what you do all day, or the sport you play. Full body workouts like Yoga and Pilates are a great way to work on strengthening both sides of your body. Tightness or stiffness can also be a sign you’ve got some underlying weakness in your postural and core muscles. If you’re weak, your body will tighten up in key spots to hold you up against gravity. Finding your tight and weak spots will help balance you out. 2. FOCUS ON YOUR LEGSTeddie’s vet visit was also a great reminder of how important it is to keep your legs strong as you age. Have you ever noticed that some folks have difficulty standing up from chairs/sofas as they get older? It’s related to a variety of things- hip weakness, stiffness in their joints, and/or a fear of falling that can develop due to decreased vision, balance, and flexibility. The fear leads to them not leaning their trunk forward enough to stand up and it just spirals from there. And guess what they start to do- overuse their arms to stand up! Just like Teddie… Left unchecked it'll increase their fall risk. Falls are the leading cause of unintentional injury-related deaths for age 65 or older. Having a solid strength training program for your legs is a key component to staying active & agile as you age. Unlike dogs, we can't walk on our hands! Focus on your hip mobility & strength and use these exercises to help you get started. DAILY MOVES: Take Sit to Stand breaks throughout the day. It’ll help counteract all the negative effects sitting has on your posture and joints but also help your heart stay healthy. There is research showing that standing up once every 20 minutes is more effective than walking 15 minutes on a treadmill for cardiovascular and metabolic changes. It’s also more beneficial than standing up 35 times at once. You’ll want to stand up every 20 minutes to overcome the negative effects of sitting. Teddie has to do 3 sit to stands per day but you need to do 3 per hour of sitting.
POWER MOVES: Add these Power Moves to workout routines for stronger legs, hips, and core muscles. OVER TO YOU: Which moves will you start with this week? FYI if you need snacks to get you motivated at first like Teddie, aim for protein snacks (it's OK to sneak in a little dark chocolate too). To Strong Legs! Mollie P.S. Want more help with your tight & weak spots? Our next round of SHINE™ & opportunity to be a part of Rest Crew #2 is coming up soon- get on the waitlist here. Did you know tight hips can make it harder for your core muscles to fire properly? Here’s a stretch to release your low back, hip, and pelvic floor muscles. It’s actually a yoga relaxation pose that is calming to your nervous system. HAPPY BABY STRETCH HOW TO DO THE HAPPY BABY STRETCH:
Make Sure You Avoid:
How To Modify:
How To Intensify:
PRO TIP: Add the Happy Baby Stretch to these 3 Moves to Prep for Better Core Workouts. Staying flexible in your hips will help you have a stronger core which helps improve your posture and performance. The Happy Baby Stretch is a great one to do daily at the end of a workout or your day. Go ahead and add it to your Rest Toolbox. To Happy Hips! Mollie P.S.EXCITING NEWS- our next round of SHINE™ & opportunity to be a part of Rest Crew #2 is coming up soon- get on the waitlist here. You know that warm, fuzzy feeling that washes over you when you’re in love? That's your LOVE hormone, Oxytocin, in action. It helps encourage us to bond with others. Like a mom & her baby while nursing. Although physical touch is the fastest way to boost your Oxytocin levels, there are some simple moves you can do to get that loving feeling going. Just a 10-20% increase will promote the relaxation response- hello Relaxed Body! Oxytocin increases your mood, empathy, trust, and openness to connect with others. It decreases cortisol, inflammation, the pain threshold, stress, and even withdrawal symptoms. Signs that it’s low include muscle aches, poor sleep, irritability, anxiety, sugar cravings, poor communication, and difficulty achieving orgasm. It definitely has some powerful jobs in the body so let’s get it flowing. 13 Moves To Boost Your Love Hormone, Oxytocin:
Lovingkindness Meditation (say out loud to yourself): May I be happy. May I be safe. May I be free of physical pain and suffering. May I be able to recognize and touch harmony and joy in myself. May I nourish wholesome seeds in myself. May I be healthy, peaceful, and strong. Spread the Love: You can say it for other people you care about as well but only after you’ve said it for yourself first. You can even expand it to strangers or a larger community. When you say it for others, change the word “I” to the name of the person (or group) you would like to say it for. Example: May (name of loved one or group) be happy. May (he/she/they) be safe. OVER TO YOU: Pick one of the Oxytocin Moves above to boost or bring back that loving feeling. See which ones work best for you. You don’t have to be into the hoopla around Valentine’s Day this year, but it's a great reminder to #1 do something that brings you joy and #2 find time to connect with others this week. Ender, Teddie and I will probably do a movie night tonight, but started the week off enjoying that awesome Super Bowl. On Friday, I'm looking forward to a karaoke happy hour I've got planned with some old friends. That'll hit a few moves on the list for me. What about you? Hope you have time to play & have some fun too! Happy Valentine's Day! Mollie P.S. No pet? No problem. Just stare into Teddie's eyes... P.P.S. Want more Relaxed Body Moves to add to your Rest Toolbox? Get started with this 3 minute Active Recovery Workout: Download Now Even though I've worked in health care for over 30 years and know the importance of self-care, I didn't truly become proactive with my own rest "care" until I was introduced to Yoga Nidra in 2018. At the time, I was struggling with the physical, emotional, and mental demands of being the primary caregiver for my father who had a stroke in 2015 that left him with memory and vision issues. He went from living on his own and Commander of the VFW in his retirement to living in an assisted living facility and needing help with everything. I was managing his medical care and life. After his stroke, he had multiple health conditions and cancer diagnoses that had to be addressed. Just when we got one area under control another would pop up. Before his last cancer surgery, we weren't sure if he could get strong enough for surgery or have to go into hospice. For years I'd help patients and families through the similar situations, but when I got on the other side and became the caregiver for the "patient" I experienced a different level of exhaustion and stress. I needed to ramp up my rest care toolbox for sure as my normal coping strategies and mind body practices weren't enough to ride out the waves of his medical crises while juggling a career at the same time. I was at the peak of my caregiver fatigue after helping my dad through 3 cancer surgeries in a year when I was introduced to yoga nidra. That ended up being a turning point in my own self-care journey. It's when I truly started to prioritize rest. It was simple so I could stick with it. I just had to close my eyes and listen to a meditation for 15 minutes. I would get the rest medicine I needed that day. Nothing helped me feel as refreshed, re-energized, and back in balance than those nidra naps. It quickly became a non-negotiable and daily practice for me. Even though my caregiver journey with dad has ended since he passed away last year, I'm passionate about sharing the powerful rest tools I've found over the years with the helpers & healers of the world. They're some of the most high risk groups for exhaustion and burnout. In a culture that values busyness and views rest as lazy, it takes courage and support to prioritize having a Rested Body & Lifestyle. I recorded a podcast with Genevieve Richardson, a Speech Pathologist and owner of Life Speech Pathologies, to share a little bit of my rest story and burnout prevention strategies for caregivers. Genevieve works with and has the Listen For Life Aphasia Podcast for stroke survivors that have aphasia and their families. We discussed Rest and Relaxation Practices to help manage the stress and fatigue associated with caregiving as well as how to set yourself up for success by shifting your mindset around rest, prepping for rest, and building a rest support team. Anyone, not just caregivers, can benefit from the rest tips we shared on this podcast episode (episode 37). The good news is it doesn't take hours and hours of resting or meditating all day to feel more energy, ease, & flow each day. It's all about resets and reps when it comes to calming your nervous system & turning on your bodies healing powers. Listen to the podcast to find which rest move you want to add to your rest toolbox today. Please share with any of the nurturers, caregivers, or stroke survivors in your life. To A Rested Body! Mollie P.S. Want to experience yoga nidra with me? The wait list for our NEW Rest Camp: SHINE™ is open. It's T-I-M-E! We've opened the Waitlist for our NEW Rest Camp. Calling all Busy Bodies & Brains... 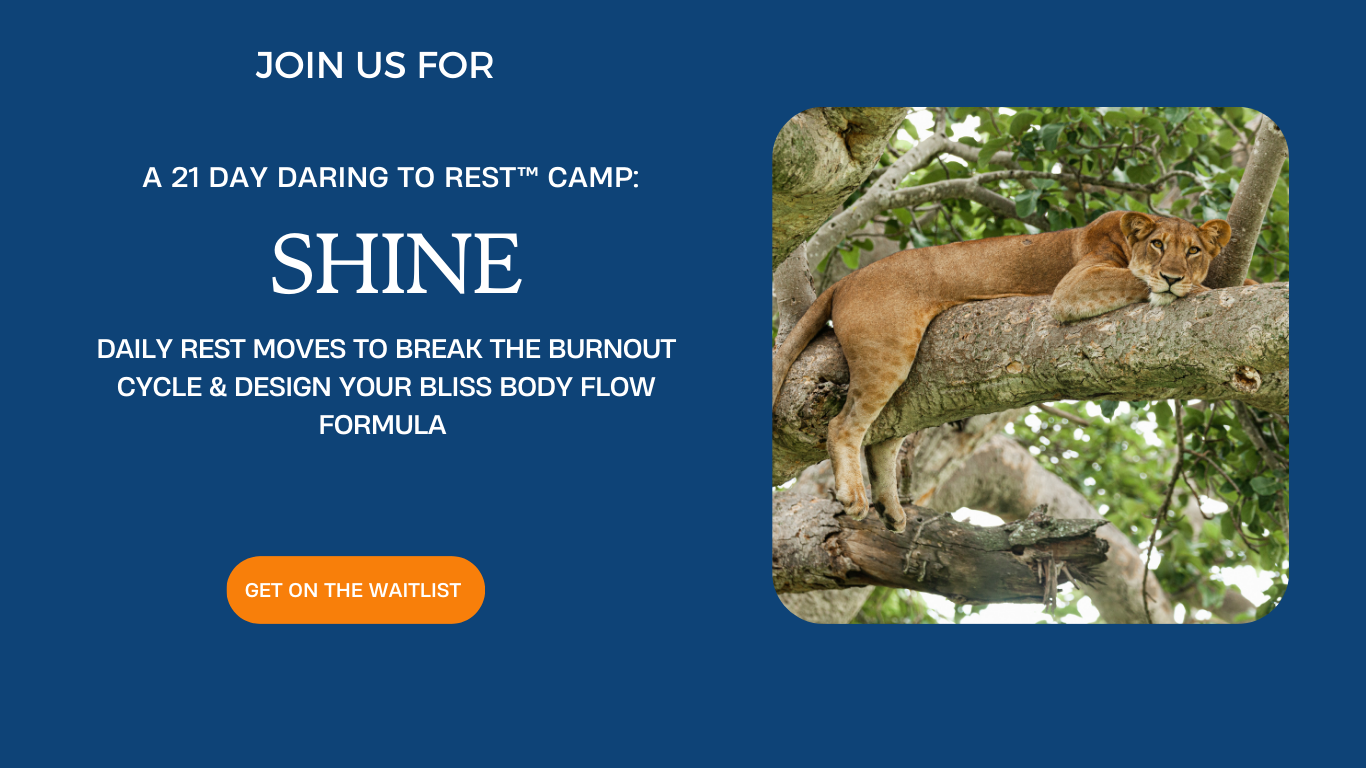 Anyone on the Waitlist for SHINE™ will be the FIRST to know the details and special offers when we open up camp this Fall. This online camp has my go to Daily Rest Moves & Tools for caregiver or clinician burnout prevention and recovery. They've helped me survive these past few years as the primary caregiver for my dad (and our Senior Dogs) as well as being a healthcare professional during a pandemic. It's the self-care program I wish I had learned about in physical therapy school. If you're a caregiver or health professional that:
Come Rest & Shine with us! There is one recommendation I share with all my clients. It doesn't matter if they have a strength or mobility issue. It doesn't matter if they have an ortho or a neuro issue. Or whether we are working on improving their pain, posture, or power. What is it? It's a hip check up. Why the hips? Movement begins at the hips. Your hips don’t lie. Imbalances in strength and flexibility of your hips will cause issues all throughout your body because everything’s connected to everything through your fascia (connective tissue). Fascia is the tough connective tissue that spreads throughout your body in a three-dimensional web from head to toe. It holds everything together from your bones and organs to the nerves, blood vessels and muscles. There are over 10 fascial lines running superficial to deep throughout your body that connect specific muscles. Did you know pain in your foot or neck can be coming from a tight hip? Since your hips are at the center of your body, tightness in your hips will pull on the end of the lines. Imagine pressing on the center of a spider web. What happens? The edges get pulled in. The same thing happens in your body. Tight spots in the body put tension somewhere on the fascial line resulting in stiffness and/or pain. If you find and release the tight spots in your fascia instead of focusing on one muscle at a time, you can improve the mobility of the entire line. Better mobility helps prevent injury, re-balance your nervous system, decrease inflammation/pain and improve your posture no matter your age or how many injuries you've had over the years. Start in the center of your body. Find your tender and tight spots in your hips then work your way down the line toward your head and feet to lengthen the fascia to make lasting changes in your posture and flexibility. Here's a hip spot to target first: Your Gluts! Grab a ball and do a hip check up to help release your tender and tight spots using the following massage & stretch moves. HIP MASSAGE MOVES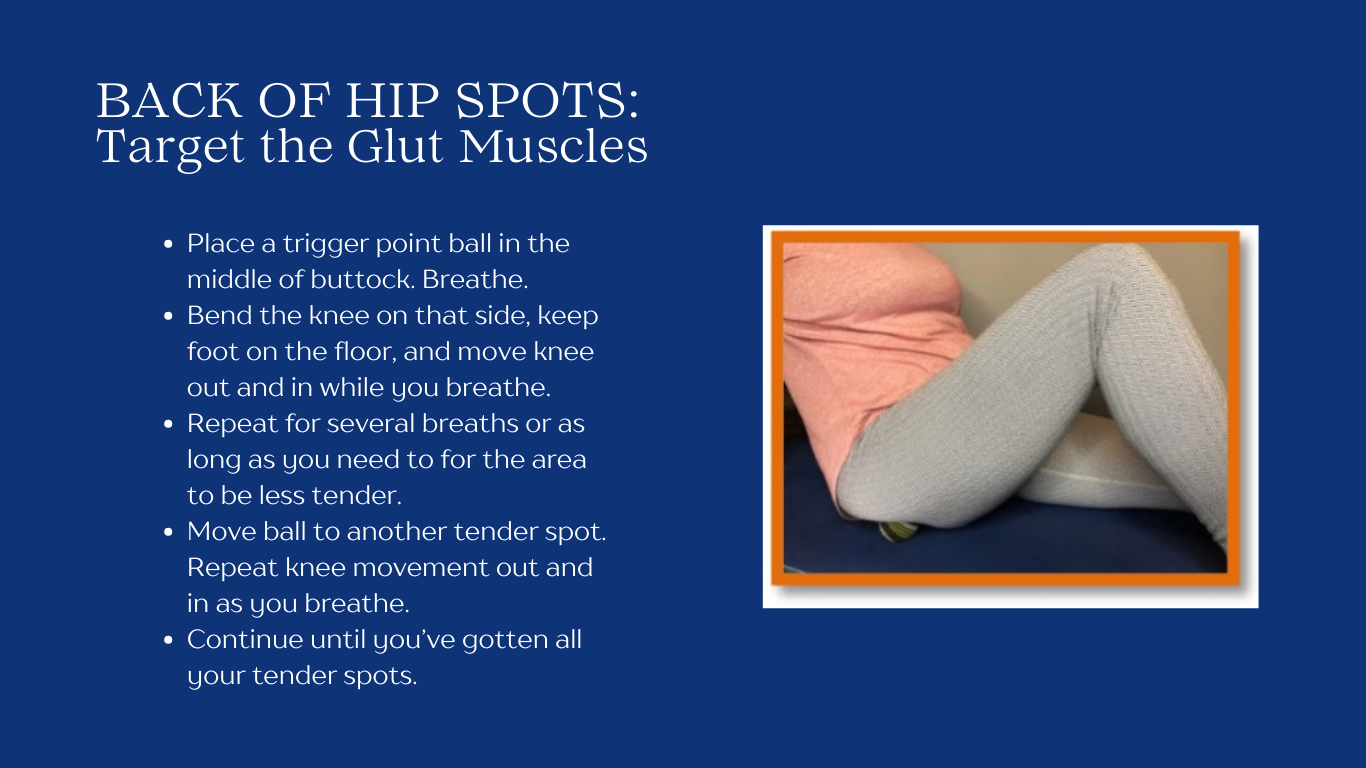 HIP STRETCH MOVES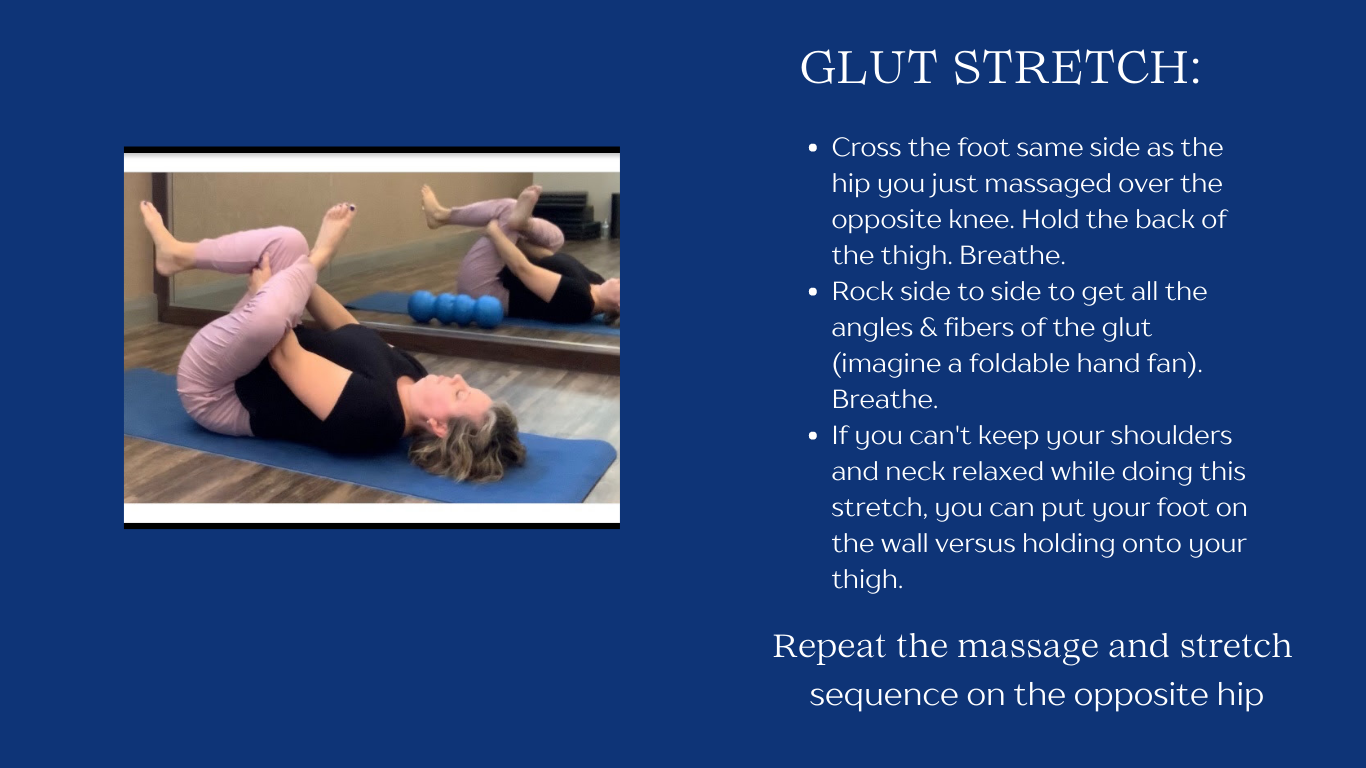 Be gentle. Go slow, breathe, and let the tissue let go without forcing it before you massage or stretch deeper. Let pain be your guide at first as a sign that you need to back off or for how much pressure or stretch to do. If you find some tender or tight spots on one side, give that side more attention. If you don't feel tender or tight, then you've got healthy hips. Go You! It's pretty common to have spots in the gluts when you sit a lot or are very active, especially if you don't have a daily stretch care routine for recovery. Regardless of what you find, here are 3 more stretch moves that will help you open up and have healthy hips.  P.S. Want to get stronger with less effort? Download this 3 minute Active Recovery Yoga Routine to help you train smarter, it's free! Download It Now We do not provide medical advice. You should consult your physician prior to beginning any new exercise program. Ready for some more simple moves to help you boost your Happy Hormones?
These healthy moves can be a great sugar substitute if you love sweets & snacks like me. And no, I'm not talking about Stevia. I love it in my coffee or tea, but it doesn't give you that Dopamine hit we are going for. Dopamine manages your brain's reward center. You get a boost of it when you do something pleasurable. It gives you a feeling of well-being, satisfaction and motivation. Think of the way you feel when you eat chips, donuts, or even binge on Netflix. Oh so good, but not so healthy and what happens next? You usually have to keep going to stay satisfied and before you know it you've gotten to the bottom of the bag of chips or finished a whole season to keep that feeling going. Haven't you? Outsmart your brain with these 10 dopamine boosters instead: 1. Meditate 2. Exercise 3. Daily Sun 4. Get 7-9 hours of sleep each night 5. Eat a protein-rich diet 6. EAT chocolate (sorry but it's true just keep it in moderation & the darkest you can enjoy; great for PMS time of the month) 7. Listen to upbeat music 8. Tackle the NUTS in your life 9. Break tasks down into small bites so you can complete one task 10. Celebrate your wins Bonus Move: Use the 3 Bite Dessert Rule- studies show it's just as satisfying for your brain to eat 3 bites vs the whole dessert. Test & Track to see which ones work best for you. You've got this! Mollie P.S. Ready to Spring forward? Here are 2 strategies to help you adjust. Both are on the dopamine booster list! Did you know we just had World Wildlife Day? For every camp sale this month, we're donating to one of our fav's. Sheldrick Wildlife Trust rescues & rehabs orphaned elephants, rhino’s & wildlife in Kenya to return them healthy to the wild as well as securing habitats for future generations, providing fresh water relief, vet rescue units and my favorite- their canine project using dogs to sniff out wildlife crime. February is a great month to check in on your self-care routines. It's not only Heart Month but mid way through is Valentine's Day. Great reminders to find more ways to love on yourself so you experience more joy & ease each day. Whether you’re a caregiver of little ones, old ones, sick ones, or furry ones, it’s so easy to neglect your own self-care (especially when those you nurture are vulnerable or ill). Just like when the flight attendant says to “put on your oxygen mask first”, putting your self-care first is security that you’ll have enough “oxygen” (i.e. good health and energy) left in your tank to help those who need you the most. It’s common among nurturers to get off track. The more simple you can make your practices, the less you’ll have to monitor yourself. When you realize you’ve gotten off track, start back up right away without beating yourself up. Your self-care doesn’t have to be a fancy spa appointment either. Something as simple as speaking more kindly to yourself is an act of self-love. Here’s a beautiful way to start. Try it right now. Say the Lovingkindness Meditation out loud to yourself: May I be happy. May I be safe. May I be free of physical pain and suffering. May I be able to recognize and touch harmony and joy in myself. May I nourish wholesome seeds in myself. May I be healthy, peaceful, and strong. How does that feel in your body? I find it calming. It relaxes and makes my body feel more open and supported. Deep Breath, Ahhhhh. Doesn’t it feel good to say these words to yourself? Pull it out anytime you’re beating yourself up about something, need a pick me up, or have monkey mind (overwhelmed with daily stressors and to do’s). You can also try it the following ways… Breathe With It: Close your eyes. Put your hand on your heart. Take 3 deep belly breaths. Say the Lovingkindness Meditation silently to yourself. Close with 3 more deep belly breaths. Sit and breathe as long as feels good to you. Spice It Up: Say the Lovingkindness Meditation to yourself in the mirror while you get ready each morning. This might feel uncomfortable or intense at first. Just keep doing it. It’ll get easier as your self-love and acceptance grows. Spread the Love: You can say it for other people you care about as well but only after you’ve said it for yourself first. You can even expand it to strangers or a larger community. When you say it for others, change the word “I” to the name of the person (or group) you would like to say it for. Example: May (name of loved one or group) be happy. May (he/she/they) be safe. OK, no excuses, it's time to be kind to yourself. Do one thing that brings you joy before you move on with your day. You're worth it! Mollie P.S. If you're worn out, burned out, or just in need of a time out, our free 3 Day Rest Adventure is for you. Say Yes To Rest |
Mollie, Ender, Ty & Teddie
Mollie Miller, PT
|
 RSS Feed